Hugo Virtual Machine Documentation
Useful links
Provisioning
The virtual machine (VM) can be provisioned in the same way as any other Azure VM.
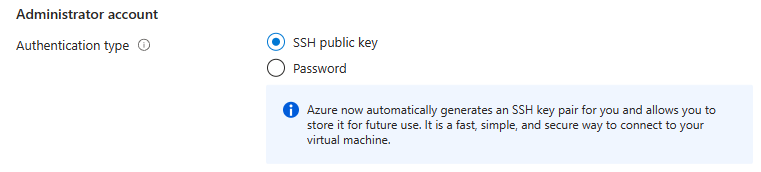
- It is strongly recommend to use SSH public key authentication rather than password
- When provisioning, select "SSH public key" rather than "Password" as the authentication type
Authenticating
We strongly recommend using SSH public key authentication.
- For more information on using SSH keys to authenticate with an Azure VM, see How to use SSH keys with Windows on Azure
- To use GUI applications such as Visual Studio Code and Firefox will require a desktop interface
- The VM is configured with the xfce desktop environment and xrdp remote desktop service
- We recommend using a remote desktop connection over SSH. This offers better security than connecting directly using remote desktop.
- The virtual machine is pre-configured, we just need to configure the client
- Login to the VM using a suitable SSH client - this will depend on your client OS For example, SSH on Linux or Putty on Windows
-
Set a password for your VM user account (the VM default username is
azureuser). (This is required for the remote desktop service. It does *not* change the SSH key requirement to login to the virtual machine. For more details see Use remote desktop with Ubuntu) -
sudo passwd azureuser - Next we need to configure an SSH tunnel for the remote desktop traffic, and the remote desktop client itself
Configure SSH tunnel
If using Windows, it is recommended to use the Putty client. If you don't have Putty installed, download and install Putty from the Microsoft Store.
- Launch Putty
- Set the hostname / IP address for the VM

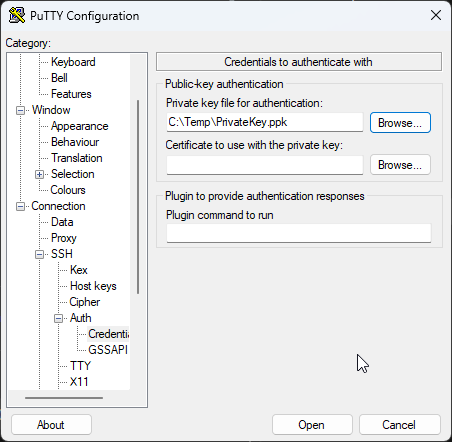
- Navigate to
Connection > SSH > Auth > Credentials - Set the SSH private key file required to connect to the VM
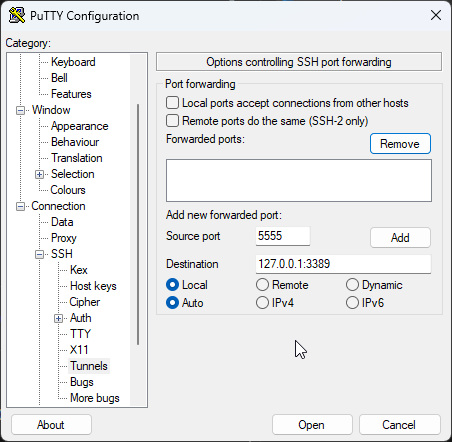
- Navigate to
Connection > SSH > Tunnels - Enter the local port and destination address to be forwarded for remote desktop protocol
- Copy the values below (adjust the local port if desired) and click add
- In this case, local port 5555 is being mapped to port 3389 (the remote desktop port) on the virtual machine
- Validate the result against the image below
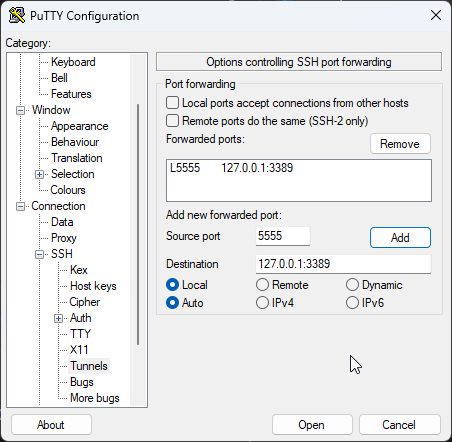
- Navigate back to the
Sessionnode and save the session
Configure Remote Desktop Client
If using Windows, you can use the built-in remote desktop client.
- Authenticate with Putty (above) - load your saved session and click "Open"
- Enter the virtual machine username (azureuser) to authenticate
- This will login to the VM and create an SSH tunnel for the remote desktop traffic
- Launch the Remote Desktop Connection app
- You name need to click "Show Option" to allow you to enter a username
- Set the Computer as
localhost:5555 - Set the Username as the VM username (azureuser)
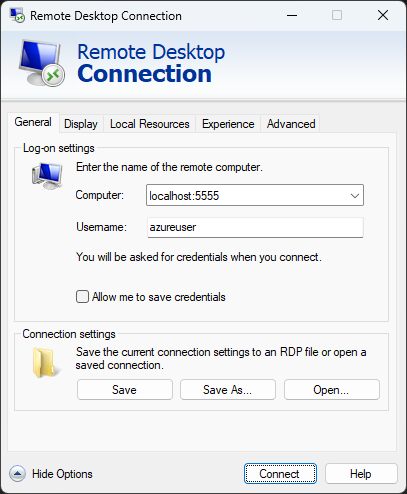
- Click "Connect". You will likely receive a certificate warning due to the tunnelling - be sure to check you are connecting to the right virtual machine
- You will be presented with the xrdp login screen - enter the password you created earlier
- You will then be connected to the VM in a remote desktop session
Install Visual Studio Code
Install Visual Studio Code or your preferred IDE
- In a remote desktop session, launch Firefox
- Navigate to https://code.visualstudio.com/Download
- Change directory to the download folder
- In the download folder run (setting the correct filename)
-
sudo apt install ./code_x.xx.x-xxxxxxxxxx_amd64.deb
Hugo Quickstart
The quickstart in the Hugo docs is a great place to get up and running quickly.
- In a remote desktop session, start Firefox
- Navigate to the Hugo quickstart documentation